
Introduction
This guide outlines the steps to get the Intel E610 10GbE Network Interface Card working on a Linux server (e.g., Proxmox). Since the necessary drivers are not available by default, you need to update the firmware and manually install the appropriate drivers. Follow the steps below to correctly install this network card.
- Details
- Hits: 12075
Lees meer: Installation Guide for Intel E610 10GbE Network Interface Card on Linux/Proxmox (english)
- Details
- Hits: 7969
Zo installeer je icinga op ubuntu 22.04 samen met director module en icingaweb2
Omdat we alle commando's uit moeten voeren als root doe ik 1 maal het volgende commando zodat ik root wordt
sudo -i root
We moeten er voor zorgen dat de repostorie van icinga wordt vertrouwd en dat repostorie wordt geinstalleerd
Voer het volgende commando uit om de sleutel van repo intelezen:
apt-get update
apt-get -y install apt-transport-https wget gnupg
curl https://packages.icinga.com/icinga.key | gpg --dearmour -o /usr/share/keyrings/Icinga.gpg

. /etc/os-release; if [ ! -z ${UBUNTU_CODENAME+x} ]; then DIST="${UBUNTU_CODENAME}"; else DIST="$(lsb_release -c| awk '{print $2}')"; fi; \
echo "deb [arch=amd64 signed-by=/usr/share/keyrings/Icinga.gpg] https://packages.icinga.com/ubuntu icinga-${DIST} main" > \
/etc/apt/sources.list.d/${DIST}-icinga.list
echo "deb-src [arch=amd64 signed-by=/usr/share/keyrings/Icinga.gpg] https://packages.icinga.com/ubuntu icinga-${DIST} main" >> \
/etc/apt/sources.list.d/${DIST}-icinga.list
icinga draait nog niet goed op php8.1 dus moeten we php8.0 installeren hier voor gebruiken de ppa repo van voor het commando uit:
add-apt-repository ppa:ondrej/php
Nu gaan we vereiste modules installeren:
apt install apache2 mysql-server php8.0 php8.0-gd php8.0-mbstring php8.0-mysqlnd php8.0-curl php8.0-xml php8.0-cli php8.0-soap php8.0-intl php8.0-xmlrpc php8.0-zip php8.0-common php8.0-opcache php8.0-gmp php8.0-imagick php8.0-pgsql -y
nu gaan we controleren of de webserver goed werkt, door het bestand p.php te plaatsen in /var/www/html met de volgende inhoud:
<?php
phpinfo();
Ga nu naar de webpagina: http://ipadresvanjeserver/p.php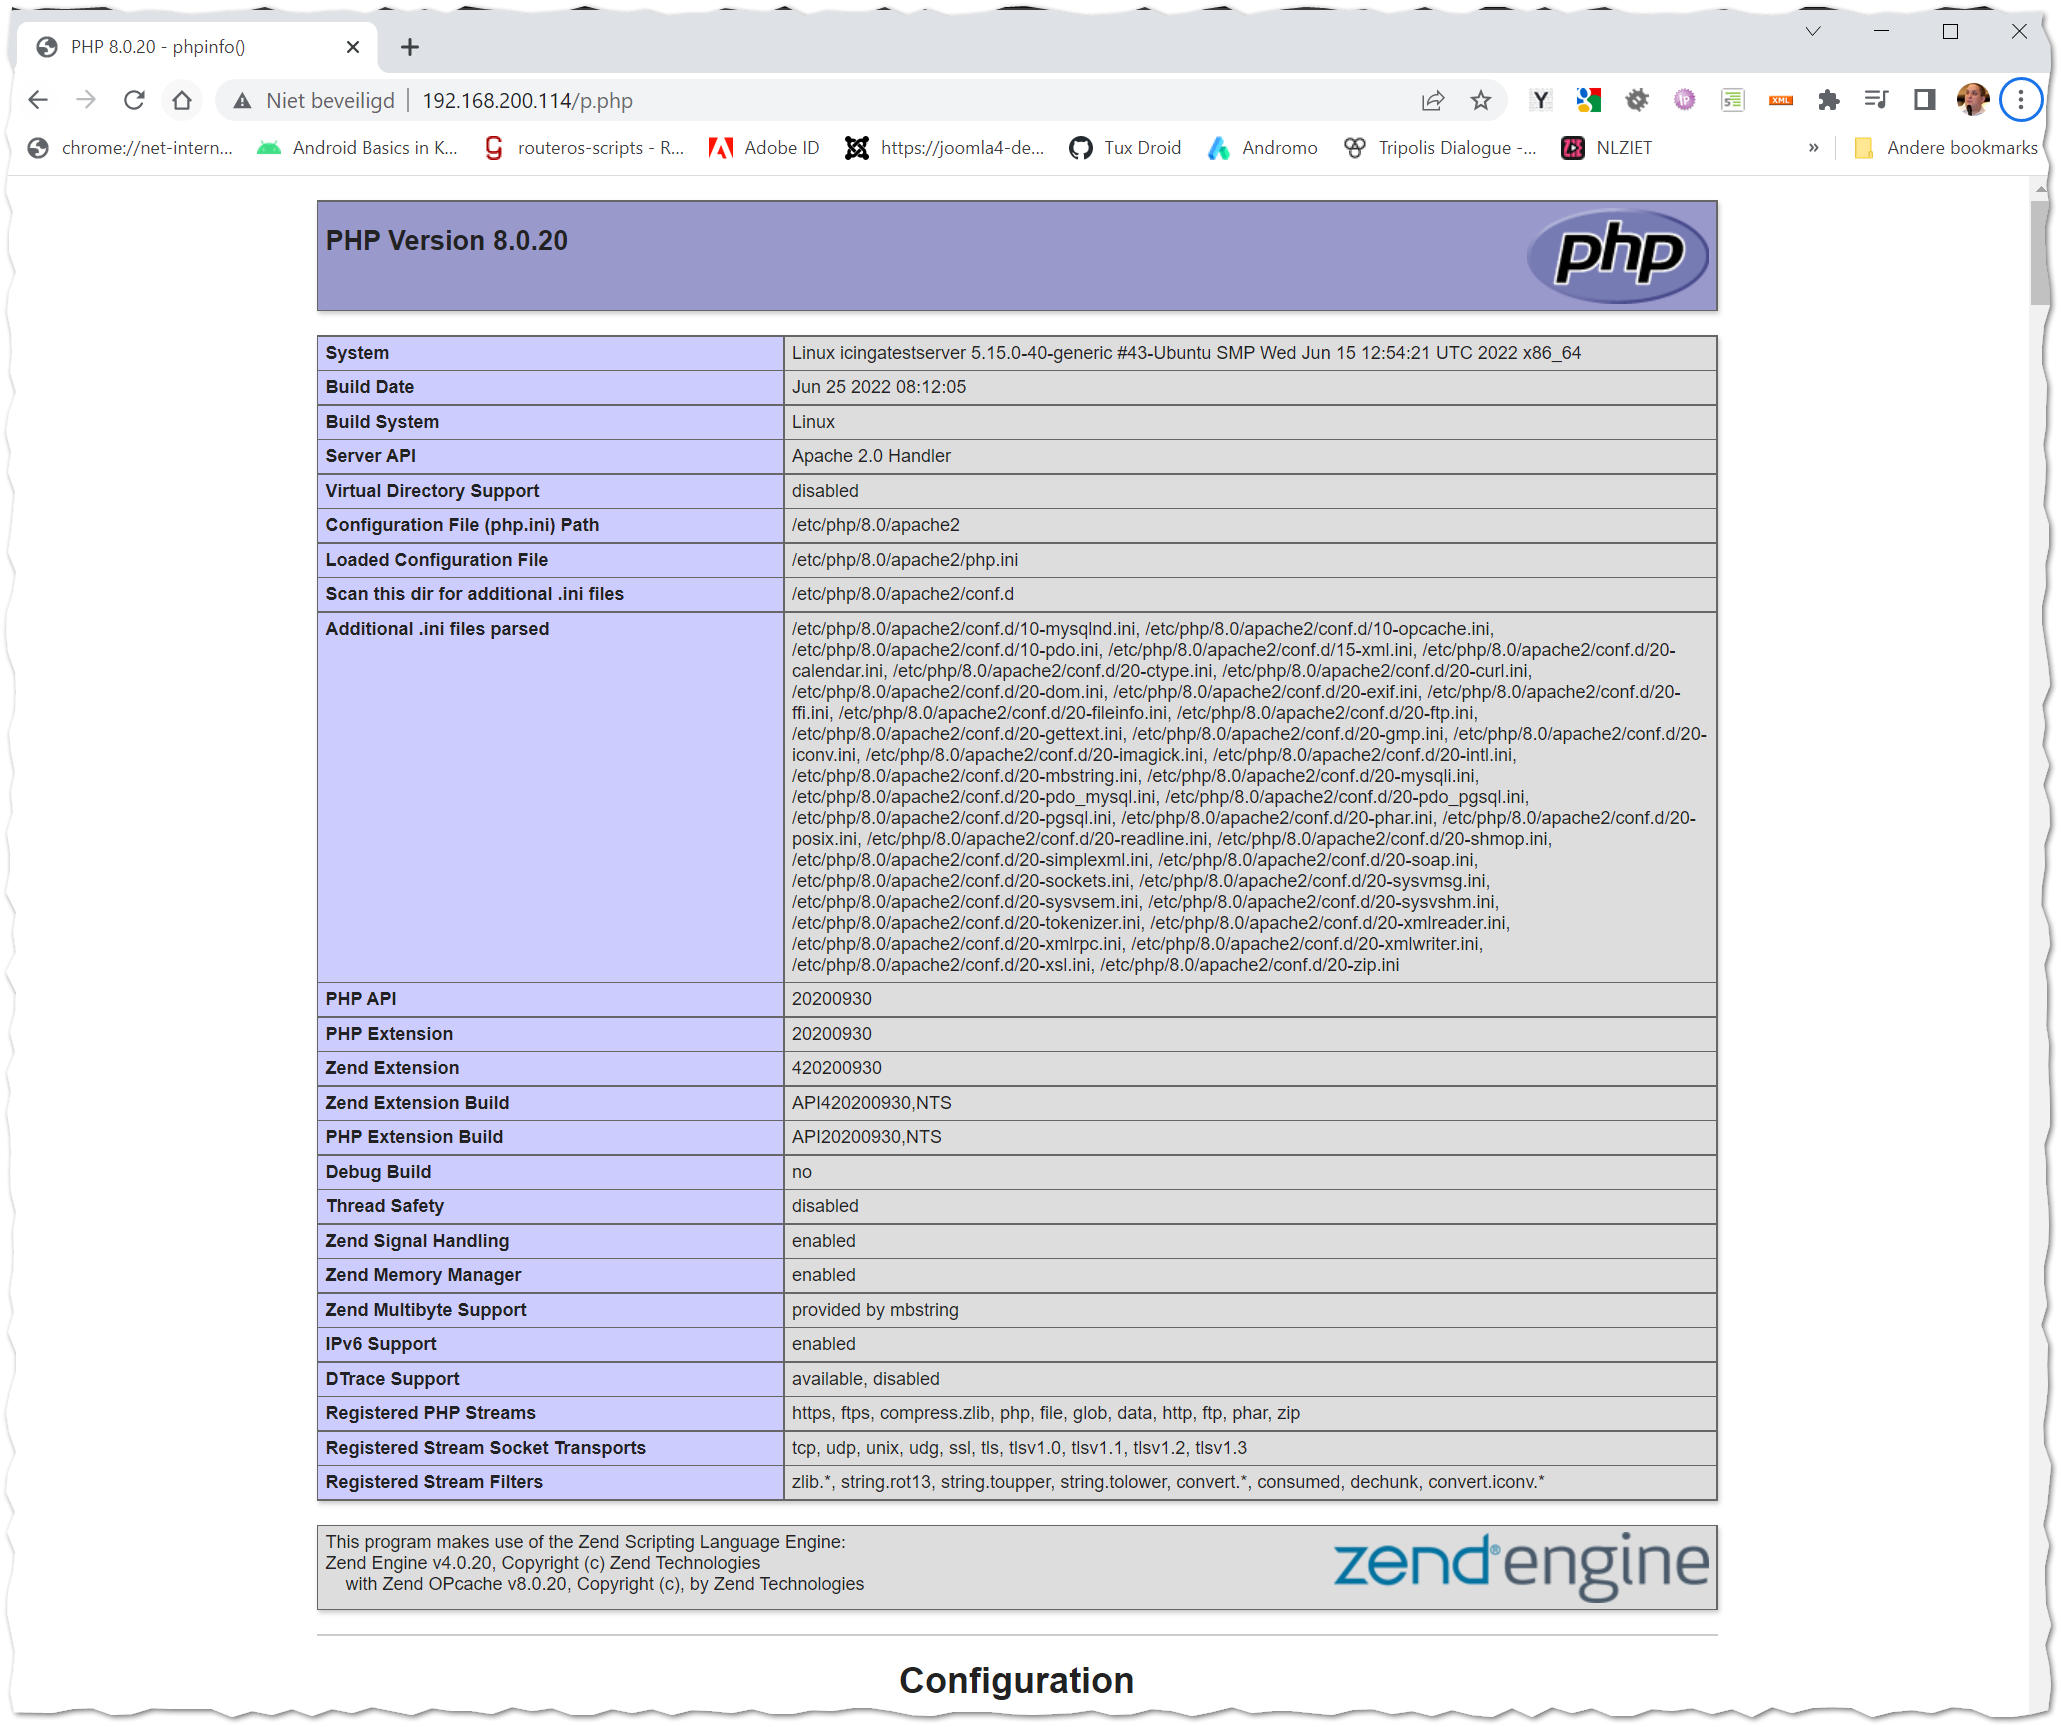
als goed is krijg je een plaatje zoals deze te zien hier rechts:
We hebben nu een draaide webserver met php en hebben een mysql server
We gaan nu databases aanmaken en de bij behorende mysql gebruikers:
Start de mysql cli interface:
mysql
Als goed is ziet dat er als volgt uit:
Welcome to the MySQL monitor.  Commands end with ; or \g.
Your MySQL connection id is 8
Server version: 8.0.29-0ubuntu0.22.04.2 (Ubuntu)

Copyright (c) 2000, 2022, Oracle and/or its affiliates.

Oracle is a registered trademark of Oracle Corporation and/or its
affiliates. Other names may be trademarks of their respective
owners.

Type 'help;' or '\h' for help. Type '\c' to clear the current input statement.

mysql>
Nu plak je volgende SQL ommando's in deze Mysql cli prompt
LET op pas de wachtwoorden aan naar iets random en niet allemaal gelijk en bewaar deze goed
create database icinga_ido;
create database icinga2_director;
create database icingaweb;
CREATE USER IF NOT EXISTS `icinga_ido_db`@`localhost`;
ALTER USER `icinga_ido_db`@`localhost` IDENTIFIED WITH 'caching_sha2_password' BY 'VeranderMijNU!' REQUIRE NONE PASSWORD EXPIRE DEFAULT ACCOUNT UNLOCK PASSWORD HISTORY DEFAULT PASSWORD REUSE INTERVAL DEFAULT PASSWORD REQUIRE CURRENT DEFAULT;
GRANT ALL PRIVILEGES ON `icinga\_ido`.* TO `icinga_ido_db`@`localhost`;
GRANT USAGE ON *.* TO `icinga_ido_db`@`localhost`;
CREATE USER IF NOT EXISTS `icinga2_director`@`localhost`;
ALTER USER `icinga2_director`@`localhost` IDENTIFIED WITH 'caching_sha2_password' BY 'VeranderMijNU!' REQUIRE NONE PASSWORD EXPIRE DEFAULT ACCOUNT UNLOCK PASSWORD HISTORY DEFAULT PASSWORD REUSE INTERVAL DEFAULT PASSWORD REQUIRE CURRENT DEFAULT;
GRANT ALL PRIVILEGES ON `icinga2\_director`.* TO `icinga2_director`@`localhost`;
GRANT USAGE ON *.* TO `icinga2_director`@`localhost`;
CREATE USER IF NOT EXISTS `icingaweb_db`@`localhost`;
ALTER USER `icingaweb_db`@`localhost` IDENTIFIED WITH 'caching_sha2_password' BY 'VeranderMijNU!' REQUIRE NONE PASSWORD EXPIRE DEFAULT ACCOUNT UNLOCK PASSWORD HISTORY DEFAULT PASSWORD REUSE INTERVAL DEFAULT PASSWORD REQUIRE CURRENT DEFAULT;
GRANT ALL PRIVILEGES ON `icingaweb`.* TO `icingaweb_db`@`localhost`;
GRANT USAGE ON *.* TO `icingaweb_db`@`localhost`;
FLUSH PRIVILEGES;
Sluit cli af met commando quit
Nu moeten we een paar php settings aanpassen in de php.ini daar voor bewerken deze file
nano /etc/php/8.0/apache2/php.ini
Zoek de waarde die hier onder staan op en pas ze aan of voeg ze toe (let op ; is een comentaar teken):
memory_limit = 256M
post_max_size = 64M
upload_max_filesize = 100M
max_execution_time = 300
default_charset = "UTF-8"
date.timezone = "Europe/Amsterdam"
cgi.fix_pathinfo=0


>
Herstart apache
function handleClick() { /* Save value of myText to input variable */ var input = document.getElementById("myText").value; /* Copy the text inside the text field */ navigator.clipboard.writeText(input); alert("Copied Text: " + input); }systemctl restart apache2
Dan gaan we icinga2 instaleren en benodige monitor plugins
- Details
- Hits: 14713